Showing posts with label Recipes. Show all posts

December 15, 2011

Coconut Cake


Tracey, who blogs at Notes From A Cottage Industry -- one of my favorite 25 blogs, had a recipe for My easy-peasy-tastes-like-scratch version of Coconut cake.  I love coconut cake.  Tracey's blog post was published around the time I was already considering the Real Food Pledge so I decided to make this recipe from scratch...so you can call this recipe the "Not So Easy-Peasy But Tastes Better Than Scratch Coconut Cake."  :)

Actually, my mother-in-law made the absolutely most wonderful Coconut Cake from scratch even down to the grating of the real coconut and using the fresh coconut milk to moisten the cake after it was baked.  My mouth begins watering just thinking about it.  I have the recipe for it and plan to someday try to bake one just like hers.  But until then, this recipe is really. really. good.

I decided to use the White Cake recipe my mother-in-law used in her "real" coconut cake.

First, toast about 2 1/2 to 3 cups of coconut in the oven.  Tracey suggests 425 degrees for 5 minutes, then stir, and let toast for another 5 minutes.  This worked perfectly.

White Cake:

2 1/4 cups flour
1 1/2 cups sugar
3/4 cup shortening (I have been substituting Coconut Oil {which is a solid} and it works great with no Trans Fatty Acids.)
1 cup milk
3 eggs whites (or 2 whole eggs - which is what I usually use)
1 tsp of vanilla
1 Tbsp coconut flavoring

Combine ingredients in the order listed.  I divided the batter into three 9" pans (or you can do two 8" pans and cut into four layers as Tracey did).  I prepare my pans with cooking spray and then cut out parchment circles to fit my pans...cakes never stick to pans when parchment paper is used.  Bake at 350 degree for 25 - 35 minutes or until lightly browned.  Let cool in pans for about 10 minutes and remove to wire racks for cooling.

While the cake is baking, prepare your coconut filling.

The coconut filling is from The New Pillsbury Family Cookbook I received as a wedding gift in 1987 -- not so "new" any more.

Coconut Filling:

1/2 cup sugar
3 Tbsp cornstarch
1/4 tsp salt
2 cups milk
1 egg
1 Tbsp butter
1/2 tsp vanilla
1 tsp coconut flavoring
3/4 cup of toasted coconut

In a medium saucepan, combine sugar, cornstarch, and salt.  Stir in milk, blending until smooth.  Cook over medium heat until mixture boils, stirring constantly.  Boil 1 minute.  Remove from heat.  Blend a small amount of hot mixture with 1 beaten egg.  Return the mixture to saucepan, mixing well.  Cook just until the mixture starts to bubble.  Remove from heat and stir in vanilla, coconut flavoring and toasted coconut.  Allow to cool.

I used Tracey's Coconut Buttercream Frosting but made a smaller amount since I only made 3 layers:

3/4 bag of confectioners sugar
3/4 cup butter, softened
3/4 Tbsp coconut flavoring
Milk to thin to desired consistency

Beat all ingredients together adding milk to desired consistency.  For this recipe, I prefer the frosting a little thinner than most frostings on cakes.

Assemble the coconut cake:

Place one cake layer on a decorative plate.  Pipe a fat bead of frosting all around the cake (great idea Tracey!) and fill the inside area with half of the coconut filling.  Sprinkle toasted coconut over filling.  Top with the next cake layer and do the same using the remaining coconut filling.  Top with final cake layer and frost with the remaining buttercream.  Sprinkle with remaining toasted coconut.  Just as Tracey states, you do not need to frost the sides because the cake is already just gorgeous.

This cake is a wonderfully moist coconut cake.  I love the creamy texture of the coconut filling with the cake and buttercream frosting.  Add a cup of coffee or a tall glass of milk and you have the perfect dessert for any holiday or birthday.

Enjoy!  I did.

Judy :)


Disclaimer:  Although this recipe is made from scratch, it is not a "diet" recipe!


October 7, 2011

Quiche Lorraine

This recipe for quiche dates back to my childhood.  I remember first having quiche probably when I was around 10 years old.  My brother, Jon, brought this recipe home when he was in high school.  His French class was cooking french dishes.  He was assigned quiche and needed to prepare it and bring it to school.  I don't remember if he actually made it (probably did...he is a wonderful cook today) or if mom did.  I do remember mom fixed it a few times after the French class project.  I love it!

When we were married, I went through Mom's recipes and copied my favorites.  This is one of them.  I am  a great lover of breakfast dishes especially eggs, bacon and cheese so this is a perfect dish for my appetite.  It is wonderful for breakfast, lunch or supper...a real crowd pleaser.


Quiche Lorraine

9 inch pie crust

6 slices bacon

1 onion, chopped

1 cup grated cheese

4 eggs

3/4 cup milk

3/4 cup heavy cream

1/2 teaspoon salt

1/8 teaspoon cayenne

dash of pepper

dash of nutmeg

Bake pie crust for 5 minutes.  Chop bacon and fry until crisp.  Remove from skillet.  In fat, saute onion.  Spread onion, crumbled bacon, and grated cheese in pie shell.  In bowl, lightly beat eggs.  Add milk, cream, and seasonings.  Pour in pie shell.  Place on cookie sheet and bake at 350 degrees for 25 - 35 minutes until firm.

Serves:  8

I will often fry my bacon and onion, shred my cheese, and place in uncooked pie shell in the refrigerator the night before.  In the morning, remove the pie shell and let it come to room temperature while you prepare the eggs, milk, cream and seasonings.  Bake per the directions above.

Be sure to use the heavy cream and don't skimp with milk or half and half.  The cream adds to the silky texture of this quiche which is why it is so outstanding!  I also use Vermont White Sharp Cheddar Cheese.  You get a great cheddar flavor without any fake yellow coloring.  I shred the cheese by hand so it is extra creamy, too.

Tip:  There is a wonderful pie tutorial on The Pioneer Woman's website.  Check it out if you have ever had trouble making pie crusts or wanted to learn.  I plan to try this soon.

Blessings!

Judy :)

This is one of the most requested recipes I bring to work when we celebrate birthdays with breakfast.  The last birthday we celebrated my boss, Tim, decided we should cut the quiche into four servings for the four of us employees.  Filled us up perfectly...hence his comment below that we figured out it only serves 4.  :)

October 2, 2011

Baked Oatmeal

I found this recipe at Karen Ehman's blog probably about a year ago but had never tried it.  In her article, she said it was her daughter's favorite breakfast growing up and it made a wonderful Sunday breakfast to eat on the go.  The word "go" was what drew me to this recipe besides the fact that we really do eat a lot of oatmeal.  Oatmeal is one of those "good for you" foods.

Last weekend, Joseph and a friend came home from college.  I fixed this at the last minute on Saturday night to be ready for breakfast on Sunday morning.  The finished recipe reminded me somewhat of Quaker Oatmeal To Go.  You remember those square oatmeal bars that are softer and thicker than a cookie.  Quaker advertised them as a bowl of oatmeal you can eat on the go.  This is much better.  They can be eaten on their own, or with milk or yogurt poured over them.  I enjoy having them on hand during the week for a quick breakfast before leaving for work.  I have made this recipe two more times this week just because it is healthy, fast, not too sweet, and just plain delicious.


The night before, combine the following in a large glass bowl.  Cover and refrigerate.

3 cups old fashioned oats (not quick oats)

1/2 cup melted butter

1 cup brown sugar

1 1/2 teaspoons cinnamon

1 1/2 cups regular buttermilk  (I have also used a Silk Milk product -- any of them would be fine.)

In the morning, let mixture stand at room temperature for five minutes.  Add:

2 beaten eggs

1 1/2 teaspoons baking powder

3/4 teaspoon salt

3/4 to 1 cup optional add-ins:  chopped, peeled apples; raisins; nuts; chopped, peeled peaches; chopped bananas; chunky old-fashioned peanut butter...whatever your heart desires!

Spread in greased 9 by 9 pan.  Bake for 25-30 minutes at 350 degrees.  Cut into squares.  Eat as is or top with milk, cream, or yogurt.  Serves 8.

The picture above shows the baked oatmeal I made for breakfast this morning.  I added dark chocolate chips (remember dark chocolate is healthy in moderation), pecans, and a little bit of vanilla.  Another great add-in I made this week was blueberries and walnuts.  I have cut this recipe in half each time I have made it and it has come out just fine.  As you can see above, a half recipe bakes well in a small cast iron skillet.   You can also melt your butter for the top step in the skillet and then the skillet is already greased for your baking in the morning.  When I made the recipe last night, I only had half of the amount of brown sugar so I finished it with a little bit of honey...equally delicious!

I will leave you with a picture of our dachshund, Gibson.  He was on the back porch begging for a treat from my husband while I was taking pictures. Couldn't resist the picture opportunity!


Enjoy!

Judy :)

Linking with Simply...This. That & The Other's "Sweet Treat Saturday".


"/>

July 14, 2011

Day 9: 10 Days of Real Food Pledge

One more day to go!  This has been a GREAT experience!

This evening, I am including another recipe.  I was glancing through some blogs at lunch and came up with this pasta meal as a combination of several recipes.  This was made up as I went and is a keeper.  It takes about 30 minutes to cook.


Chicken Pesto Pasta

Pasta

Chicken Breasts

Olive Oil

Onion

Garlic

Grape or Cherry Tomatoes

Pesto

No amounts are given because I just made it up as I went.  You can make this for a large group or just for two, as I did.

Bake your chicken breasts in a 400 degree oven for about 30 minutes.  I drizzle my chicken with olive oil and season with lemon pepper.

Cook your pasta in a large pot of salted boiling water.  Remember you only have one chance to salt pasta and be sure to add enough.  I cooked brown rice pasta tonight for my husband's preference.  Whole wheat pasta  or regular pasta would be fine, too.

In a skillet, heat about 2-3 Tbsp of olive oil.  Add onion and garlic and saute until soft and turning translucent.  Add grape or cherry tomatoes that have been cut in half.  I used a large handful for just the two of us.  Cover and allow the tomato skins to begin to burst.  Now add some pasta water (I began with about 1/2 cup) and pesto.  Stir and cook until the sauce begins to thicken.  Feel free to add more pasta water as needed to adjust thickness.

Remove chicken from the oven and slice on the diagonal.  Add sliced chicken to the pasta sauce and coat.  When the pasta is al dente, add the pasta to the sauce and toss to coat the pasta.  Add pasta water if sauce seems too thick.  Serve with parmesan cheese.


We have a house guest this weekend.  Meet Coby!  He is a Shih Tzu puppy.  He belongs to a coworker and we have the privilege of spending the weekend with this ball of fuzz.  Our dachshund has adjusted to the house guest as well as can be expected.  At this very moment, my dachshund is in my lap and Coby is asleep at my feet.  How can a woman be any more loved than that?

Hope you enjoy the recipe and I'll post again on Saturday to close out this series with my thoughts on my diet, health, and real food.

Judy :)

July 13, 2011

Day 7 & 8: 10 Days of Real Food Pledge

I didn't really have anything to report yesterday because I ate food prepared earlier in this challenge.  Today, being Wednesday, made our supper a "fix whatever you want evening".  I fixed my usual oatmeal around 8:00 pm this evening, but was "hankering" for some biscuits, too.  I have always made homemade biscuits with self-rising flour, shortening, and buttermilk.  Tonight I found a recipe for whole wheat biscuits and they ended up being a pretty good substitute.  This recipe came from Nourished Kitchen.  She explains whole wheat flour dough made with buttermilk and allowed to soak from 2 hours to overnight make a more tender biscuit.  I made my dough out of 1 1/4 cups of whole wheat flour, 1/4 cup cold butter, and 1/2 cup buttermilk after I came home from work and let it soak until about 8:00 (3 hours).  Then I kneaded in 1/2 tsp soda and 1/2 tsp salt (you can definitely use less salt), cut my biscuits and baked at 450 degrees until lightly browned on top.  These biscuit were much better than other whole wheat biscuits I have tried before.  Definitely a recipe to continue playing with.  I also used some Simply Fruit Jam with my biscuits.

Eat healthy!

Judy :)

July 11, 2011

Day 6: 10 Days of Real Food Pledge

Today's real food was wonderful.  Look below for a couple of recipes!

I left a crock pot of dried black beans to be cooked while I was at work.  My husband was nice enough to turn them on for me a couple of hours before I got home.  This could have been a great night to have a vegetarian meal, but I have a teenage son who thinks all meals need meat so I decided to add a little bit of meat to the beans.  I shredded a chicken breast after I got home and added it to the beans with a little bit of seasoned salt.  I served the black beans with brown rice, yellow squash (fresh from the garden), corn bread, and guacamole.  The brown rice was quick cooking brown rice out of my pantry.  I need to do some research on quick cooking brown rice to see if it has the same nutritional value as regular brown rice.  The quick cooking brown rice is more tender.  I used 100% Stone Ground White Cornmeal in the corn bread without adding any additional flour.  I really can't tell a difference in the texture or taste compared to adding a little flour to stone ground cornmeal or using a corn meal mix.  The bread rises normally.  I had some avocados that needed to be used so I thought some guacamole would be nice with the beans...and it was!  Wal-Mart's Great Value brand of salsa is all natural -- no unknown ingredients or you can easily make your own.

Here are the recipes for the Corn Bread and Guacamole:

Corn Bread (Southern)

2 Cups 100% Stone Ground Cornmeal (I use Hodgson Mill)
2 tsp baking powder
1 tsp soda
1 1/2 tsp salt
2 Cups buttermilk
2 eggs, unbeaten
1/3 cup oil

Pour oil into your cast iron skillet (medium to large size) and place in oven.  Turn oven to bake at 425 degrees.

Combine cornmeal, baking powder, soda, and salt.  Add buttermilk and eggs.  Stir to combine.  Once your oven is warm to 425 degrees remove your skillet and pour the hot oil in your batter.  Stir and pour batter into your iron skillet--enjoy the sizzle!  Place in oven and bake for 25 - 35 minutes until lightly brown on top.

This recipe is easily cut in half and then baked in a 6-8 inch cast iron skillet.  Perfect for two!


Guacamole

1 avocado
1 garlic clove, finely chopped
1 Tbsp lime juice
1 Tbsp salsa
1 Tbsp sour cream

Mash avocado with garlic.  Add lime juice, salsa, and sour cream.  Best if prepared at least an hour before serving.  The sour cream adds a nice creaminess to the guacamole.  Cover with saran wrap touching the surface of guacamole to store.

Judy :)

July 4, 2011

July 4, 2011: Repost - Sour Cream Potato Salad

Happy 4th of July!  Potato Salad goes hand in hand with 4th of July celebrations.  We are meeting with some friends from church for our annual 4th of July celebration and I am taking my Sour Cream Potato Salad.  I thought I would repost this recipe for you.  I posted this for the first time just a year ago and it has been my second most viewed blog post.  This recipe is probably one my most requested recipes from friends and family, too.  Enjoy the recipe (again) and I wish for you an exciting but relaxing holiday!


Sour Cream Potato Salad

Unpeeled or peeled red potatoes, cut in bite size pieces and boiled, about 8 - 9 medium potatoes

6 slices of bacon, diced, and fried crisp

1 to 1 1/2 teaspoons fresh dill or dill weed, to taste

1 Tablespoon apple cider or white vinegar

3/4 cup sour cream

3/4 cup mayonnaise

1 1/2 cups shredded cheddar cheese

3-4 green onions

Cook the potatoes and fry the bacon crisp.  Combine dill or dill weed, vinegar, sour cream and mayonnaise until smooth and creamy.  Add dressing and 1 cup of shredded cheddar cheese to cooled potatoes.  Slice green onions and their stems.  Sprinkle extra 1/2 cup on cheddar cheese on top of potato mixture, then sprinkle green onion and crisp bacon pieces.

I am not a huge raw onion fan.  I love the taste that an onion leaves behind, but just don't like the bite.  Leaving the onions on top of the salad allows the onion lovers to get as much as onion as they want and allows folks like me to dig deeper to leave the onions behind.

Judy :)

July 28, 2010

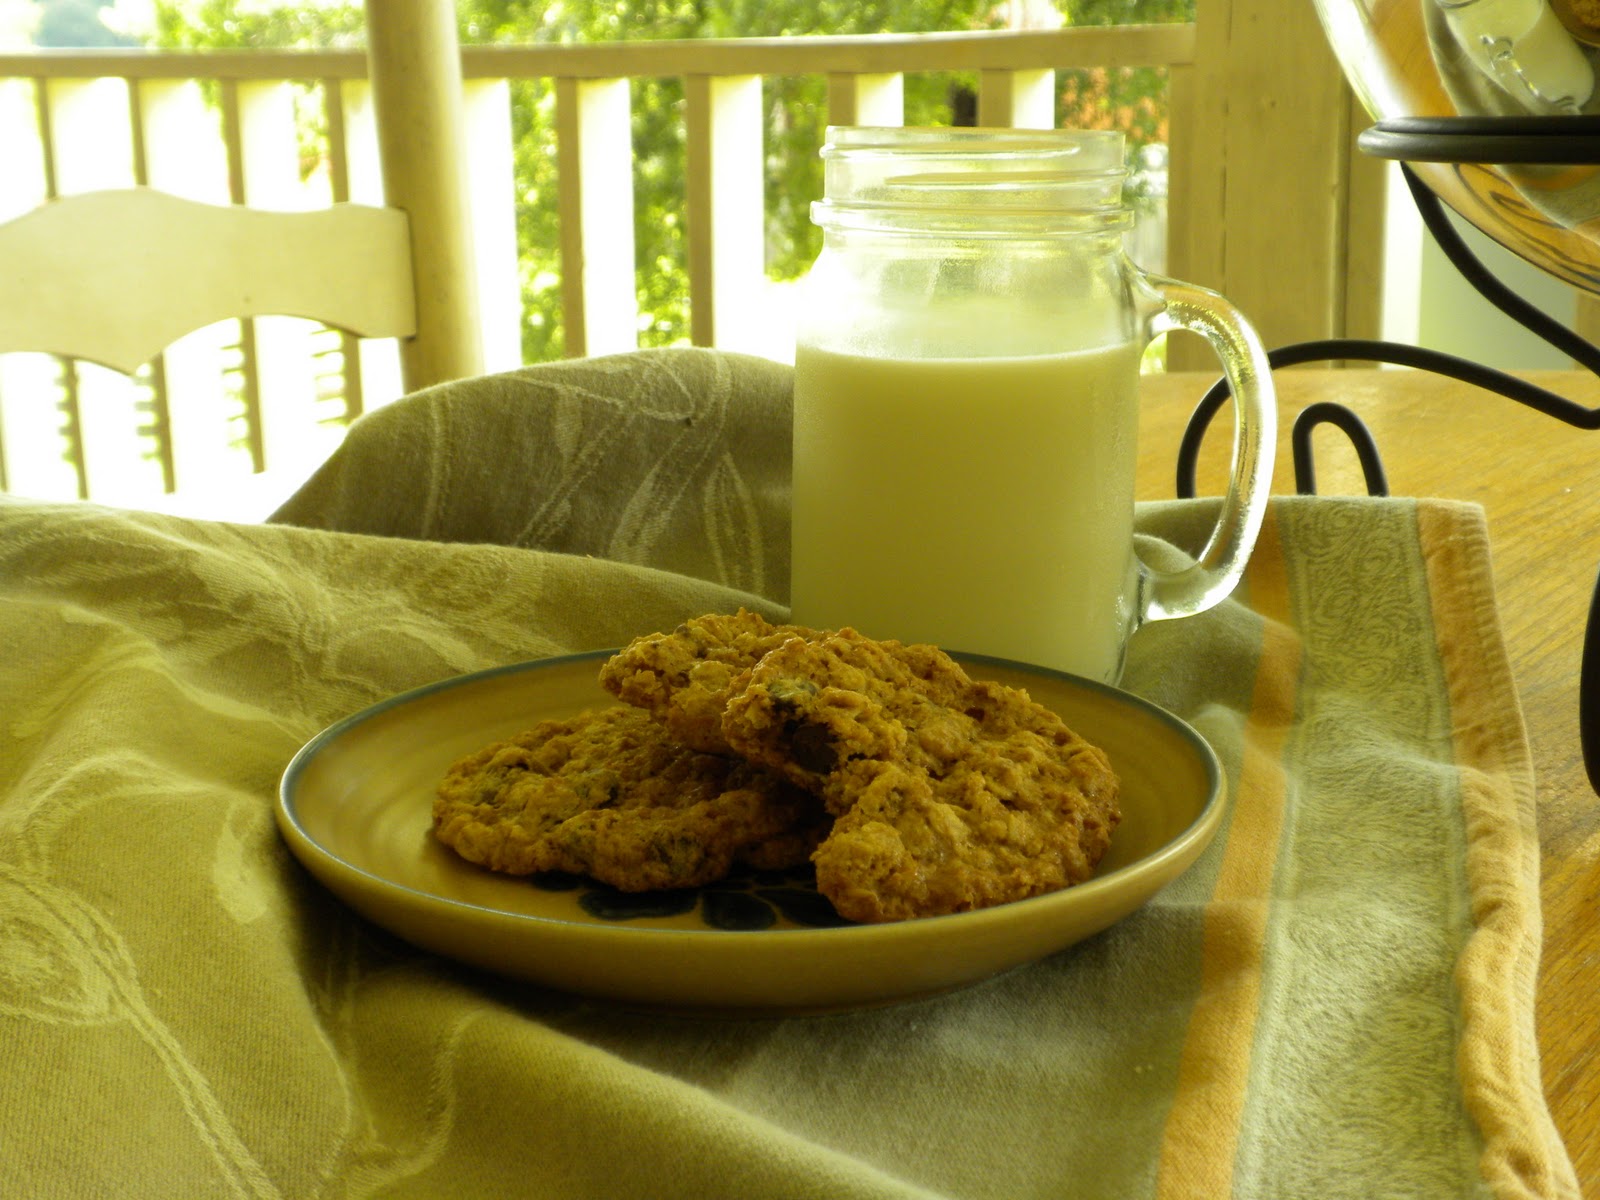
Whole Wheat Oatmeal Chocolate Chip Cookies


I tried this new recipe last night and really loved it.  I found this recipe at a website called 101 Cookbooks.  You can find this recipe here.  Since I am working on the 8 Weeks to Optimum Health by Dr. Andrew Weil, I was excited to find a cookie recipe with whole grains.  This has rolled oats, whole wheat flour, and wheat brain.  (For any of you who liked my Nutritious Oatmeal Bran Muffins, you could use the oat bran in this recipe in exchange for the wheat bran.)

I only made a couple of changes to the recipe.  Instead of using dark brown sugar or Muscovado sugar, I used Turbinado sugar.  It was getting old and clumpy and needed to be used.  This may have changed the texture a little bit.  I have found Turbinado sugar tends to do that when I cook with it.  Also for the 10 oz of semi-sweet chocolate bar, I used less than 1/2 of a 11.5 oz bag each of Milk Chocolate Chips and Dark Chocolate Chips.  I was out of semi-sweet or I would have used 10 oz of them and I didn't have any chocolate bars.

The cookies turned out crunchy, chewy and would make great cookies to sandwich ice cream between.  They were scrumptious and even approved by my 17 year old!

Pop on over to 101 Cookbooks and check out her website.  I believe she is a vegetarian and all of her recipes look delicious.  In this part of the country, the problem sometimes is finding the ingredients.  Have a great Wednesday!

Judy :)

07/30/10 Note:  Linked to The Inspired Room.  These cookies have "inspired" me because you can eat healthy even when you are having a treat!  Hope everyone enjoys these.

July 16, 2010

It's A Salad Party

Traci at Beneath My Heart is having a Salad Party.

Since I just posted my Sour Cream Potato Salad a few days ago, I am going to add that post to her Salad Party.  If you are interested in some new salads, head that direction by clicking on the link above.  There are some yummy salads already listed.  Enjoy!

~Judy :)

July 5, 2010

July 4th Recipe - Sour Cream Potato Salad


This potato salad recipe has become my ultimate favorite potato salad.  My sister-in-law, Leta, saw a recipe similar to this one prepared on a cooking channel.  She made it for a family gathering out of her head and I have further adapted it for our tastes.  My recipe leans more toward a baked potato theme.  Hope you enjoy it!

Sour Cream Potato Salad

Unpeeled or peeled red potatoes, cut in bite size pieces and boiled, about 8 - 9 medium potatoes

6 slices of bacon, diced, and fried crisp

1 to 1 1/2 teaspoons fresh dill or dill weed, to taste

1 Tablespoon apple cider or white vinegar

3/4 cup sour cream

3/4 cup mayonnaise

1 1/2 cups shredded cheddar cheese

3-4 green onions

Cook the potatoes and fry the bacon crisp.  Combine dill or dill weed, vinegar, sour cream and mayonnaise until smooth and creamy.  Add dressing and 1 cup of shredded cheddar cheese to cooled potatoes.  Slice green onions and their stems.  Sprinkle extra 1/2 cup on cheddar cheese on top of potato mixture, then sprinkle green onion and crisp bacon pieces.

I am not a huge raw onion fan.  I love the taste that an onion leaves behind, but just don't like the bite.  Leaving the onions on top of the salad allows the onion lovers to get as much as onion as they want and allows folks like me to dig deeper to leave the onions behind.

Hope you enjoy the salad.  It is delicious!

Note:  July 16 - I am adding this post to a Salad Party at Beneath My Heart.  Click on over there and enjoy some new salad recipes!

~Judy :)

3/20/12 Some great recipes are found at Beauty & Bedlam's Tasty Tuesdays.  I'm linking up today here.:


Beauty and Bedlam

June 16, 2010

Everlasting Rolls by Sister Schubert

This is the roll recipe that Sister Schubert was taught to bake when she was 12 years old.  This is also the recipe that the Sister Schubert's Homemade Rolls in the freezer section of the grocery store were based on.  I tried this recipe this weekend and the rolls turned out great.


Everlasting Rolls
Parker House-Style Rolls

1 package active dry yeast

1 1/2 cups warm water (105 degrees F to 115 degrees F)

5 cups sifted all-purpose flour, divided

1/2 cup sugar

1 1/2 teaspoons salt

1/2 cup shortening, melted (cooled to 105 degrees F to 115 degrees F)

2 large eggs, lightly beaten

1/2 cup butter, melted

1 1/4 cups all-purpose flour

Combine yeast and warm water in a 2-cup liquid measuring cup; let stand 5 minutes.

Combine 4 cups sifted flour, sugar, and salt in a large bowl. Stir in yeast mixture and shortening.  Add eggs and remaining 1 cup sifted flour; stir vigorously until well blended.  (Dough will be soft and sticky.)  Brush or lightly rub dough with some of the melted butter.  Cover loosely with a damp tea towel; let rise in a warm place (85 degrees F), free from drafts, for 1 1/2 hours or until doubled in bulk.

Grease four (8-inch) round foil cake pans; set aside.

Sift 3/4 cup flour in a thick layer evenly over work surface; turn dough out onto floured surface.  (Dough will be soft.)  Sift 1/2 cup flour evenly over dough.  Roll dough to 1/2-inch thickness; brush off excess flour.

Cut out dough using a floured 2-inch biscuit cutter.  Pull each round into an oval, approximately 2 1/ inches long.  Dip one side of oval into melted butter.  Fold oval in half with buttered side facing out  (Floured side will form the famous Parker House pocket.)

For each pan, place the fold of 10 rolls against side of prepared pan, pressing center fronts of rolls together gently to seal.  Place 5 rolls in inner circle, and 1 roll in center, for a total of 16 rolls per pan.  Cover loosely with a damp tea towel, and let rise in a warm place, free from drafts for 1 hour or until doubled in bulk.

Preheat oven to 400 degrees F.

Bake rolls, uncovered, for 12 to 15 minutes or until lightly browned.

Yield:  64 rolls

Whole Wheat Variation:

Substitute 2 cups whole wheat flour and 3 cups all-purpose flour for the 5 cups all-purpose flour listed above.  Instead of plain melted butter for dipping the rolls, use 1/2 cup melted butter mixed with 2 tablespoons honey.  Bake as directed for Everlasting Rolls.

If you are baking rolls for your freezer, allow the pan to completely cool on wire racks, then slide each pan into a large zipper bag and freeze.  Do not stack pans until completely frozen.  To reheat, allow rolls to thaw completely and heat at 350 degrees F for 10 minutes.

Sister says:


These are my favorite rolls, and they are yours to bake and enjoy.  The secret to the light-as-a-feather texture of these rolls:  Don't knead the dough!

Baking yeast bread is not time consuming, but the rising times require your attention.  Plan to be at home for a span of 4 hours.  The recipe makes 4 pans:  one for  dinner, two for the freezer and one to share with a friend who will be amazed at your skill in the kitchen!

Where's the best place in your home for the dough to rise?  It's your laundry room.  Wash a load of towels and put them into the dryer.  Cover the top of the dryer with a clean towel and place your dough on top.  Be sure to cover the dough loosely with a damp tea towel.  Turn on the dryer and close the laundry room door.  The heat and humidity create a good environment for yeast activation and your laundry will serve two purposes.

Relax and enjoy the heavenly aroma of freshly baked yeast rolls!

When I baked this weekend, I bake the Whole Wheat Variation.  I especially loved the butter/honey combination to dip the rolls in.  I may continue to use this with all of my rolls.  It wasn't too sweet, but it gave the rolls that extra "oomph".  I do like my rolls a little sweeter than these and would probably add a little extra sugar the next time I make them, but that is just me.  I'm a sweet roll kind of gal!  I either didn't roll my rolls to 1/2 inch thick or my biscuit cutter is larger than 2 inches because I only got 37 rolls out of the recipe.  I did really like the laundry room idea to raise the dough and that worked fine for me.  I only have a laundry "closet" and with the doors closed it did stay toasty enough to raise the dough even when I washed other clothes and not a load of towels.

I hope you enjoy these.  This recipe came out of the Sister Schubert Cast Your Bread Upon the Waters, Recipes for Success, Cooking & Living cookbook.  Your can purchase this cookbook at this link.

June 14, 2010

Sister Schubert...And A Recipe!

My friend, Kathy, and I went to Spring Park Farmer's Market in Tuscumbia, Alabama this week to see a demonstration by Sister Schubert of the Sister Schubert's Homemade Rolls fame.  We arrived at Spring Park and I told her that I should have brought my camera.  She had hers and volunteered to take pictures, so we have a guest photographer for this post.  The pictures turned out wonderful!

Sister Schubert bakes those fabulous rolls you find in the freezer section of the grocery store that taste like homemade...they don't have that manufactured bread taste.  If I don't make my own rolls, her rolls are always the ones I pick if I'm fixing a meal for guests.


Sister Schubert was very impressive.  Her grandmother taught her how to bake her Everlasting Rolls when she was 12 years old.  She began making them for family gatherings.  She catered for a while and her customers loved her rolls.  The church she attended hosted a frozen food fair and the secretary took order for deliveries during the holidays.  She received an order for 80 pans of rolls that Christmas.  The next year there were 200 orders and the next year the secretary stopped the orders at 300 pans of rolls.  She went around to the local grocery stores inTroy, AL to try to sell her rolls to the public and handed out samples.  The orders started coming in and kept coming.  She soon converted her sun porch into a bakery in 1991, then they moved to a warehouse in 1992.  In 1994 she built her first facility with 25,000 square feet.  By 1998, she had expanded to 80,000 square feet.  In 2000 after much prayer and talk, they sold their stock to another corporation.  She was concerned and wanted to be assured that the quality of her rolls and the name brand would not be changed.  The corporation hired her and her husand to stay on and run the company.  So, she is still running the company without the headaches of the boardroom.  Her title is now Founder and Vice President of Product Development and Manufacturing.  Sister remains happy in the kitchen creating new products for her rolls.  Her rolls can be purchased all across the US today.

She demonstrated her Lemon-Blueberry Trifle and everyone present got a sample.  It was delicious!  Of course, for me, anything with real whipped cream is the best!  The recipe will appear at the end of the post.


I believe her main reason to be in Tuscumbia was to sell her new cookbook.  She had a book signing at Cold Water Books earlier in the day.  She also sold her book and signed copies at Spring Park.  The cookbook is called Sister Schubert:  Cast Your Break Upon The Waters, Recipes for Success, Cooking & Living.  All proceeds from the book go to the Barnes Family Foundation which is a charitable organization that helps food banks and area shelters in their efforts to feed the hungry.  The cookbook contains recipes for all types of food including main dishes, sides and veggies, breakfast dishes, rolls, breads, desserts, and holiday favorites.  You can purchase a cookbook at Sister Schubert's website.  I purchased one and the recipes look fabulous.  I can't wait to try out some of them!


Lemon-Blueberry Trifle

2 pints blueberries, washed and sorted

2 pints strawberries, washed, hulled and cut into bite-sized pieces

Juice of 1 lemon plus 1 tablespoon of grated lemon rind

2/3 cup sugar, divided

1 quart heavy cream

1/2 teaspoon almond extract

1 (11 oz) jar lemon curd

1 pan Sister Schubert's Blueberry Rolls, prepared per package directions

Combine berries in a large bowl; sprinkle with 1/3 cup sugar, lemon juice, lemon rind and cornstarch.  Using a large saucepan over medium heat, simmer berry mixture until berries begin to soften and release juice, approximately 3 minutes.  Set aside to cool.

Using large bowl of mixer on high speed, whip cream with 1/3 cup sugar and almond extract until soft peaks form. Do not overbeat.  Using a small bowl, combine a tablespoon of lemon curd with 2 tablespoons of whipped cream, stirring until well combined.  Add remaining lemon curd and combine with whipped cream.  Beat on high speed until somewhat stiffer peaks form and lemon curd is well combined.

Remove Blueberry Rolls from pan and cut into 1-inch pieces.

To Assemble:
Spoon a layer of whipped cream filling into a large glass trifle bowl.  Add a layer of Blueberry Rolls.  Add a layer of berries with juice.  Continue layering until you have used all of the roll pieces and berries with juice.  Finish with a layer of filling.  Cover tightly and refrigerate until ready to serve.

Yield:  1 large trifle

Sister says:
My family loves this creamy rich dessert.  You may use a china bowl, but then you'll miss the gorgeous colors of the berries with the soft white filling and dark purple Blueberry Rolls.  You will bring a little taste of summer to your table any time you serve it!

It was a wonderful evening to share with a friend.  I'll do another post soon on Spring Park's Farmers Market...one of my favorite farmers markets.  I'll also post the Sister Schubert's recipe for Everlasting Rolls this week.  So stay tuned.

Have a great week!

P. S.  Thank you, Kathy, for going with me and taking pictures!

May 26, 2010

Life By Chocolate


I made these cupcakes today for a dessert supper (how wonderful does that sound!) that we are having at church tonight since it is the last night in the quarter for our bible class.  The recipe for these Life By Chocolate cupcakes comes from The Pioneer Woman's website.  You can link to her recipe here:  http://thepioneerwoman.com/cooking/2010/01/life-by-chocolate/.

I fully intended to follow her recipe, but I left out one important ingredient - baking soda!  I actually noticed that I hadn't put in any baking soda or baking powder but decided that must be how the recipe was written.  When I looked back later, there was a teaspoon of baking soda added when the buttermilk mixture was combined.  I missed that, but I after tasting the dessert...I like the deletion.  These cupcakes, of course, didn't raise much but the texture is more of a chocolate torte than a brownie or cake.  A little more fancy than a cake.  And I think that is good!  A wonderful mistake that I will probably make again.

The ganache icing is wonderful and super easy.  It makes a great topping instead of icing.  I used dark chocolate which is a marvelous contrast with the sweet cake.  This recipe made 18 cupcakes plus enough for a small ramekin.  You could probably make 20-22 cupcakes, but I prepared one 12- cupcake pan and one- 6 cupcake pan.

Have a great Wednesday night!

Note:  5/27/10  These are really great after they have been refrigerated and are very cold.

April 17, 2010

Nutritious Oatmeal Bran Muffins


I am not much of a sit-down-and-eat-breakfast type person.  I love sit-down-breakfasts, but in the real world I just don't plan out enough time.  I want as much sleep as I can get before leaving the house for the day.  I usually grab something on the run and eat it as I head out or after I get to work with my hot green tea.  The past few weeks I have been perfecting a recipe for healthy muffins.  This recipe actually came about by combining the better parts of three different recipes.  I finally have the consistency, sweetness, and taste down to where I really like them.  Since these muffins have bran in them, they are not light and fluffy, but they aren't too heavy either.  The sweetness is light, but you can always make them sweeter if you like. 

Nutritious Oatmeal Bran Muffins

Whisk together the following dry ingredients:

3/4 cup Oat Bran
3/4 cup Whole Wheat Flour
1/2 cup Rolled Oats
1/2 cup Brown Sugar, packed
1 tsp Baking Powder
1/2 tsp Baking Soda

In a separate bowl, whisk together the following wet ingredients:

1/2 cup Plain Yogurt
3 Tbsp Olive Oil
1 Egg
1/4 cup Milk
1/2 tsp Vanilla

Add the wet ingredients to the dry ingredients and stir until just moistened.

Fold in the following add-ins:

1/3 cup Dried Sour Cherries
1/3 cup Toasted Walnuts
1/3 cup Dark Chocolate Chips

Fill muffin tins 2/3 full.  Bake at 400 degrees for 18-20 minutes.  Makes 10-12 muffins.

I know, I know!  Chocolate Chips aren't healthy!!  My excuse is that Dark Chocolate has antioxidants that your body needs and is really good for you in moderation.  This is your moderation for the day.

Seriously, you can change the three add-ins to whatever you would like:  Raisins, Dried Cranberries, Fresh Blueberries, or Banana for the fruits.  Any type of nuts you choose...or no nuts if that's not your thing.  Coconut might be nice.  You could try white chocolate, peanut butter, or milk chocolate chips. 

These are some notes about some of the ingredients:

Oat Bran - You can find this on the cereal aisle where the hot cereal is located.  Sometimes it is called Oat Bran Cereal.  You can substitute wheat bran if you like.  I like the milder flavor of the oat bran.  Be sure to freeze this ingredient if you aren't going to use it in a few weeks.  It will go rank and spoil if you don't.

Rolled Oats - I wanted oatmeal in these muffins besides the oat bran. I used the old-fashioned rolled oats instead of the quick-cooking oats. It takes your body longer to digest the rolled oats since they have not yet been processed. The harder something is to digest, the better it is for your digestive system and the slower the sugar gets into your system (glycemic index).  Feel free to use quick cooking oats if that is all you have.

Plain Yogurt - You could substitute sour cream, but then it wouldn't be as nutritious!  Plain Yogurt is a great substitute for sour cream in most recipes and can also take the place of buttermilk.  I buy a large tub and cook with it often.  It doesn't spoil too easily and will last for a few weeks.

Toasted Walnuts - I do toast my nuts before putting them into the recipe.  It really brings out the flavor.  I chop the nuts and throw them in a dry skillet over medium heat for just a few minutes.  Shake the pan occasionally to keep them from burning on one side.  When you start smelling them, they are done.  Hint:  I buy a huge bag of walnuts at Sam's and keep them in the freezer.  I take out a frozen handful, chop them, and then toast them. 

Enjoy!